This recipe comes from www.iambaker.net . A very special cake for a very special occasion, Valentines Day. Good luck and enjoy!
Heart Cake Tutorial
Its ok. You can admit it. We are all friends here.
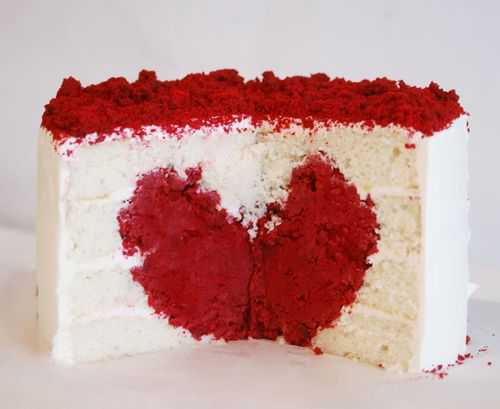
Do you remember this little thing?
Well it turns out some of you daring bakers want to make this yourselves. Yeah you! I cant wait to see and read all about it… send me links girls! (and boys… if there are any boys)
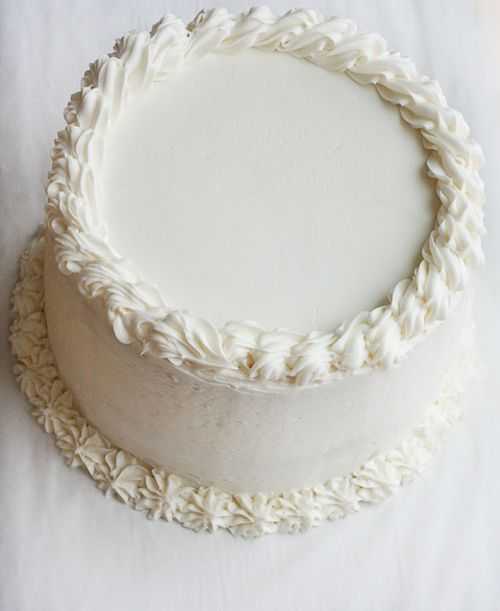
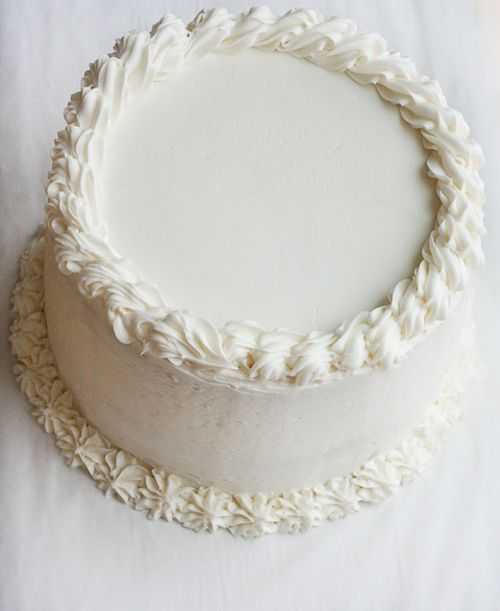
Well. In order for me to do a tutorial I had to make another one. So, forgive the less then stellar decorations, but here is our 'tutorial' heart cake.
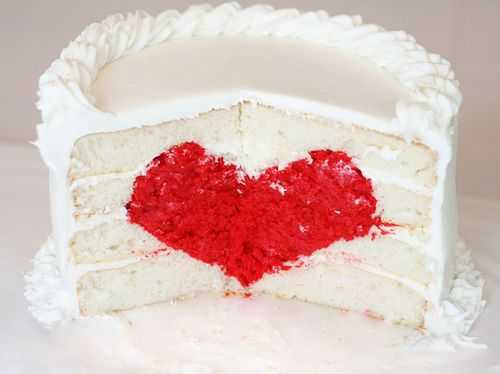
But you didnt come to see the outside right?
Here goes.
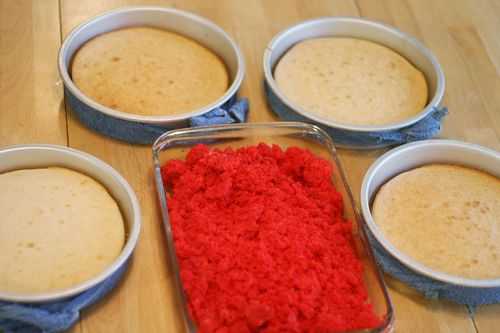
Start out by making four eight inch pans of white cake. (If you want the actual recipe, just click here)
Make one 9×13 (you can do whatever shape and size you want) pan of red velvet cake. (recipe here)
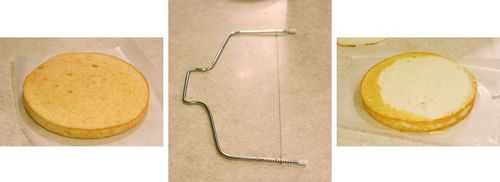
First I need to level each cake.
I use this handy dandy leveling cake thingy I got at Walmart for a few bucks.
Remember to do this for all four white cakes.
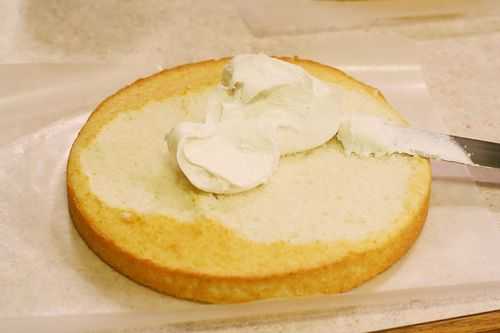
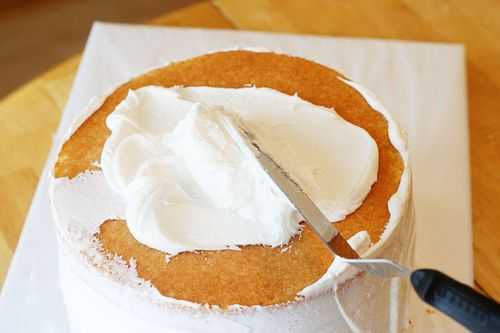
Add about 1/2 cup to 1 cup frosting and then put one layer on top. You want two separate two layer cakes at this point.
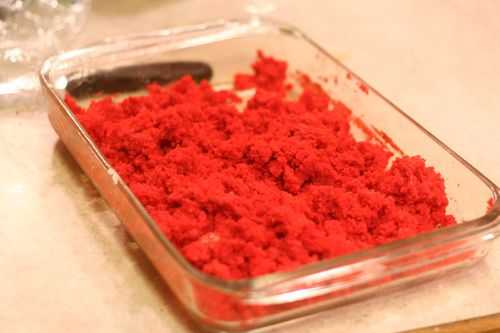
For the red velvet cake I just ran my fork through it to break it up. Then I added about a cup of frosting and combined well.
NOW! I usually like to freeze the cakes for at least a couple hours. If you cant freeze them, at least try and pop them in the fridge for a bit!
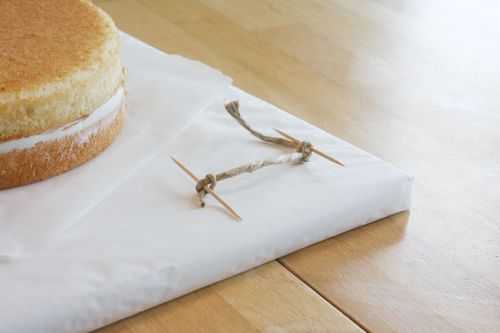
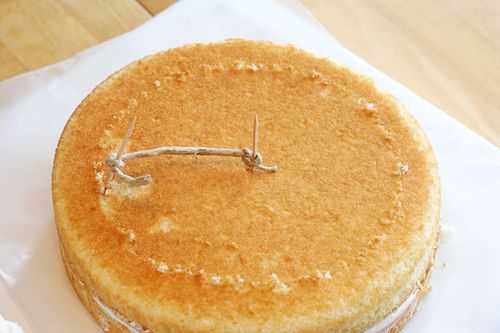
I know this looks pretty weird (maybe cause it is) but this is what I am going to use to make sure I have some uniformity in the heart design. Its just two toothpicks and a piece of twine.
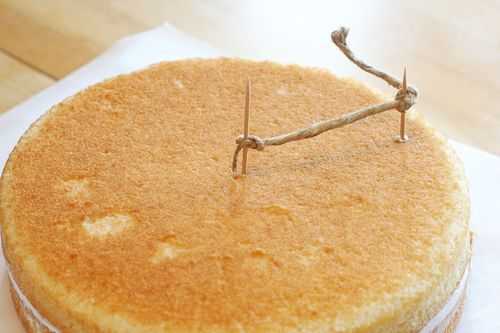
Place one toothpick in the center of the cake, then (holding firmly) drag the outside toothpick around the cake and make a circle.
Like this! Now I have a rough guide line of where I am going to being carving. Do this to both cakes. (or, if you are a good drawer, just take a knife and cut a shallow line around the perimeter.)
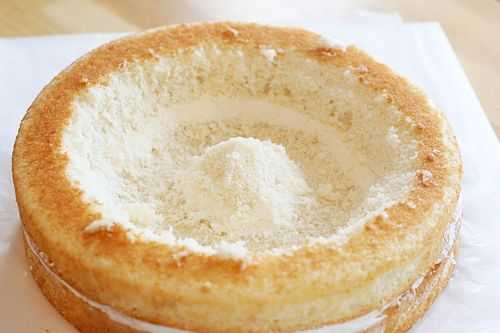
Carve out a V shape in the cake.
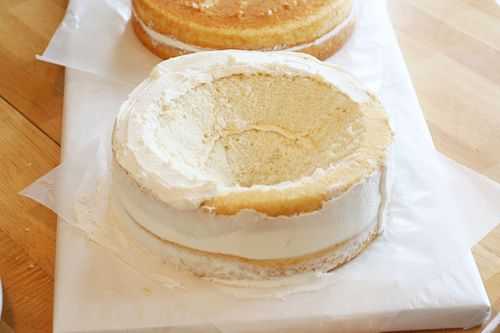
The top half of the heart is a little trickier. This time, I started with my knife in the center of the cake and created this little island.
I then moved back out to my "guide line" and started cutting. I ended up creating this channel. Once this has been created, you can go back in a do some more carving to create more detail.
Here is after I went in with a spoon and carved out a bit more.
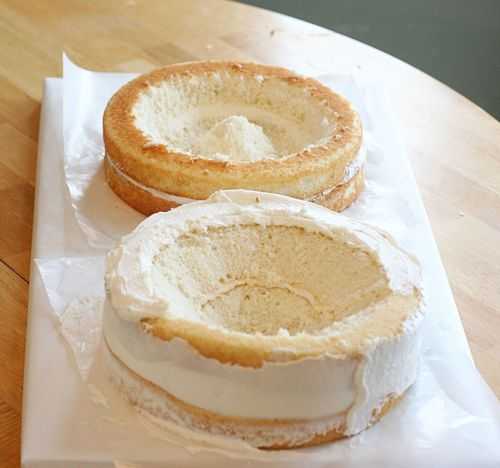
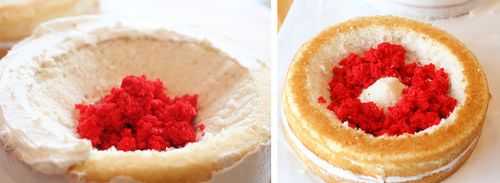
The two cakes carved out. The hard part is pretty much done now!
Now I can start filling in the cakes with the red velvet cake.
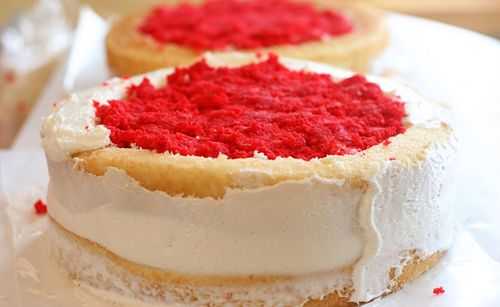
All filled! At this point I put it in my freezer for about 15 minutes. Just to let them set.
I added some frosting the the edge of the bottom cake. Make sure you know which is which! You are going to want to add the cake with the hallowed out 'channel' to the top of the V cake.
Here goes nothin! I have found the easiest way to do this is to just use your hand. Place it flat over the top of the 'channel' cake and flip it over. Then gently place it one the bottom cake.
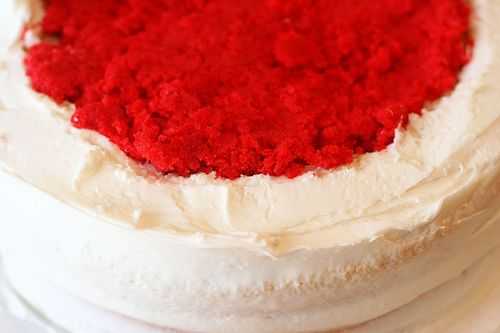
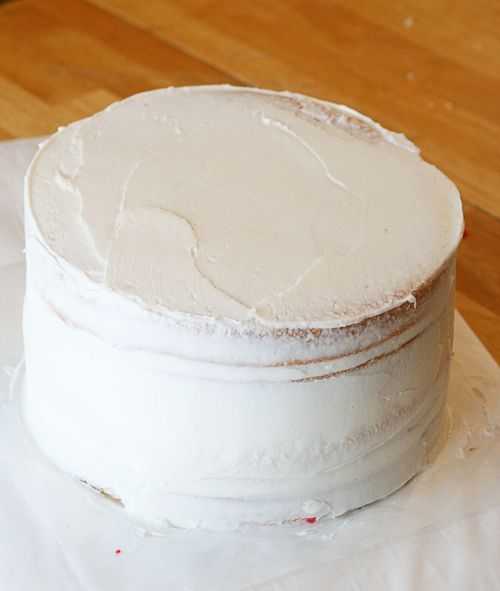
Add some more frosting and do a rough crumb coat over the whole cake.
And here is our thin layer of icing for the crumb coat. Put this in the fridge about at least a half hour, or as long as overnight.
Now. Go eat an apple. Seriously. Cause if you are anything like me you have been snacking on the cake scraps this whole time and you need a healthy energy boost.
There. Feel better? Lets get back to work.
I ended up using all my red velvet cake so I didnt have any left over for decoration. So white it is!
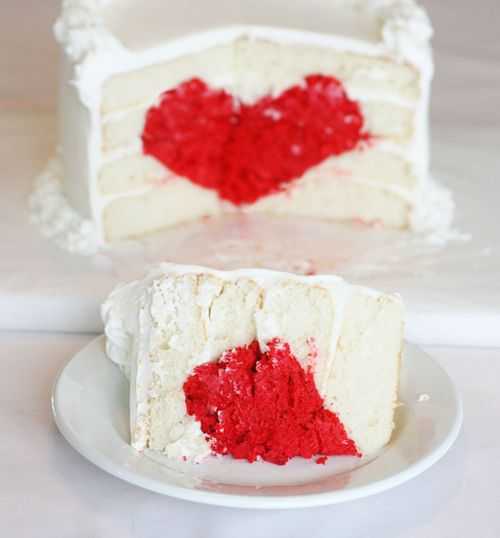
Ready to see what all this work was for?
I thought it turned out pretty good! Granted, this is my third time making it in a month so I had better be able to at least make it presentable by now. 
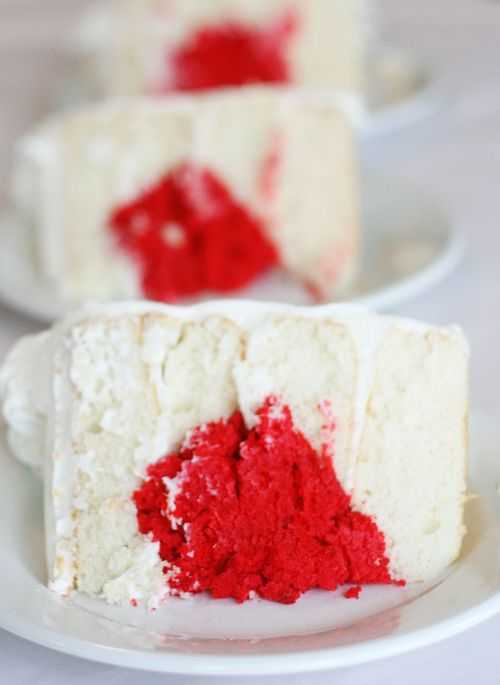
And it tastes as good as it looks! (I might be biased)
So I hope you are brave enough to try a heart cake for your loved one this Valentines Day. Be sure to let me know how it works out.. and take lots and lots of pictures! 
Recipes:
Red Velvet Cake
For the red velvet cake I messed around with a recipe from Magnolia Bakery.
*This is how I modified this recipe: I used 2 sticks of butter, 2 eggs and 2 egg yolks, 2 tablespoons of food color, and apple cider vinegar. I wanted a more dense cake because I knew I was using it in the center of the heart cake and I needed to make sure it was sturdy enough.
3 1/3 cups cake flour (not self-rising)
3/4 cup (1 1/2 sticks) unsalted butter, softened
2 1/4 cups sugar
3 large eggs, at room temperature
6 tablespoons red food coloring
3 tablespoons unsweetened cocoa
1 1/2 teaspoons vanilla extract
1 1/2 teaspoons salt
1 1/2 cups buttermilk
1 1/2 teaspoons cider vinegar
1 1/2 teaspoons baking soda
Directions
Preheat oven to 350 degrees.
Grease and lightly flour three 9 x 2-inch round cake pans, then line the bottoms with waxed paper.
To make the cake:
In a small bowl, sift the cake flour and set aside. In a large bowl, on the medium speed of an electric mixer, cream the butter and sugar until very light and fluffy, about 5 minutes. Add the eggs, one at a time, beating well after each addition.
In a small bowl, whisk together the red food coloring, cocoa, and vanilla. Add to the batter and beat well.
In a measuring cup, stir the salt into the buttermilk. Add to the batter in three parts, alternating with the flour. With each addition, beat until the ingredients are incorporated, but do not overheat.
In a small bowl, stir together the cider vinegar and baking soda. Add to the batter and mix well. Using a rubber spatula, scrape down the batter in the bowl, making sure the ingredients are well blended and the batter is smooth.
Divide the batter among the prepared pans. Bake for 30-40 minutes, or until a cake tester inserted in the center of the cake comes out clean. Let the layers cool in the pans for 1 hour. Remove from the pans and cool completely on a wire rack.
*****
*I used only all-purpose flour and then added 1 tsp baking powder. I am going to play around with this a bit more next time and maybe even add some baking soda. I found this recipe on Food Network.
White Cake
- 1 1/2 cups self-rising flour
- 1 1/4 cups all-purpose flour
- 1 cup (2 sticks) unsalted butter, softened
- 2 cups sugar
- 4 large eggs, at room temperature
- 1 cup milk
- 1 teaspoon vanilla extract
Preheat oven to 350 degrees F.
In a small bowl, combine the flours. Set aside.
In a large bowl, on the medium speed of an electric mixer, cream the butter until smooth. Add the sugar gradually and beat until fluffy, about 3 minutes. Add the eggs, 1 at a time, beating well after each addition. Add the dry ingredients in 3 parts, alternating with the milk and vanilla. With each addition, beat until the ingredients are incorporated but do not over beat. Using a rubber spatula, scrape down the batter in the bowl to make sure the ingredients are well blended. Carefully spoon the batter into cake pan. Bake for 20 to 25 minutes (for round cake), or until a cake tester inserted into the center of the cake comes out clean.
*****And I am loving Magnolia's Vanilla Buttercream frosting.
*My only modification to the recipe is I like to add a little almond extract, and it seems that 1 tsp. is the perfect amount! And be sure to use CLEAR vanilla extract to get a white frosting.
Makes enough for one 2-layer 9-inch cake or 2 dozen cupcakes*
- 1 cup (2 sticks) unsalted butter, softened
- 6 to 8 cups confectioners’ sugar
- 1/2 cup milk
- 2 teaspoons vanilla extract
Place the butter in a large mixing bowl. Add 4 cups of the sugar and then the milk and vanilla. On the medium speed of an electric mixer, beat until smooth and creamy, about 3-5 minutes. Gradually add the remaining sugar, 1 cup at a time, beating well after each addition (about 2 minutes), until the icing is thick enough to be of good spreading consistency. You may not need to add all of the sugar. If desired, add a few drops of food coloring and mix thoroughly. (Use and store the icing at room temperature because icing will set if chilled.) Icing can be stored in an airtight container for up to 3 days.


Tidak ada komentar:
Posting Komentar