This diy comes from www.theidearoom.net . A cool idea that can be used in many ways.
How to Make Leaf Skeletons
I wanted to share with you a project from one of my readers who shares with us how to make leaf skeletons. I LOVE this! I have several leafs in various forms displayed in my home and knew I needed to make some of her leaf skeletons to add to my decor. I love how a pattern of leaves can enhance the beauty in your home. So I asked Heather if she would mind sharing her project with you. You can find more great projects from Heather at her blog The Other White House.
I have spent hours and tried various ways of making these. Kailey did these last year in her botany class with our homeschool group. I found her page of tiny skeletons and thought these would make a great addition to fall. I’ll Mod Podge them to something I’m sure, but for now they are in between two panes of glass in a frame on the mantle. Anyway~ this ‘recipe’ is the only one out of a million that have worked!


Washing soda is a strong base so you may want to wear gloves when handling the leaves.
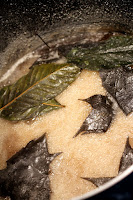
Keep going, you will need to add more water so your pan doesn’t dry out. I added enough to cover the leaves. The washing soda will crystallize on top.

I carefully removed them and rinsed with water and added clean water to the pan. With the spatula I removed the leaves to dry on a paper towel.
I have spent hours and tried various ways of making these. Kailey did these last year in her botany class with our homeschool group. I found her page of tiny skeletons and thought these would make a great addition to fall. I’ll Mod Podge them to something I’m sure, but for now they are in between two panes of glass in a frame on the mantle. Anyway~ this ‘recipe’ is the only one out of a million that have worked!
You need washing soda, not baking soda! Very important! I found it at Harris Teeter and can also be found in some Wal-Marts.

Gather your leaves. Waxy leaves work best like Gardenia, Magnolia, Hydrangea, etc. I grabbed Gardenia and maple leaves, straight off the tree/ plant. Place them in a pot large enough to accomodate the amount you want to skeletonize.

Washing soda is a strong base so you may want to wear gloves when handling the leaves.
You will add 3/4 cup of washing soda and 4 cups of water to your pot of leaves. When the water comes to a boil reduce and simmer the suckers. I left mine for an hour and forty five minutes. After 40 minutes it begins to look really ugly..
Keep going, you will need to add more water so your pan doesn’t dry out. I added enough to cover the leaves. The washing soda will crystallize on top.

When 1.75 hours are up fill a glass baking dish with cool water. Gently remove your leaves from the pot. I used a blunt spatula. Place leaves in shallow baking dish with cool water and use a small blunt brush to remove the remaining pulp. I pounced on them gently.
I carefully removed them and rinsed with water and added clean water to the pan. With the spatula I removed the leaves to dry on a paper towel.
If you’re still with me, this is what I ended up with…
I have a maple leaf which turned out not so well. We shall see when it dries. You could add these anywhere, I’m thinking a hurricane, hmm.. These will last depending on how you preserve them. You can spray paint them, coat them with a clear poly and even bleach them. I plan to bleach the next batch.


Tidak ada komentar:
Posting Komentar