Rabu, 30 November 2011

DIY THREE VINTAGE PAPER ORNAMENTS TO MAKE FOR THE HOLIDAYS!

   This diy comes from www.heartlandpaper.typepad.com.  This tutorial is for not just 1 ornament but three.  Good luck and happy paper folding.

All ornaments


We've created 3 fun ornaments for you to make with your friends and family. We hope you enjoy making them for your holiday season.
6 Pointed Star Ornament
This star is so easy to make, but has a huge wow factor! You will love how easy it is to make if you have a Scor-Pal Tool. Just mention KSL at the stores until December 15th to get 20% off a scor pal.


6 pointed star


Download 6 Pointed Star Ornament Instructions


Ribbon candy


Ribbon Candy Ornament:

Download Ribbon Candy Ornament Instructions


Vintage ball ornament


Vintage Ball Ornament:

Download Vintage Ball Ornament Instructions

DIY HOLIDAY GIFTS, PART II!

   This comes from http://www.chow.com/ .  Enjoy and good luck!


Homemade Amaretto Recipe


Homemade Amaretto

Difficulty: Easy

Total Time: 20 mins, plus macerating, filtering, and infusing time
Makes:About 4 cups
The beauty of making your own amaretto lies in controlling the sugar content of this almond liqueur. In a side-by-side tasting of our homemade amaretto and popular commercial brands, ours was less sweet and had a true almond flavor. For the sweet tooths out there, just add more sugar.
What to buy: Apricot kernels are the dried seeds of fresh apricots. They have an almondlike yet bitter flavor and can be found online.


Bottled or purified water is important because any impurities in the water may affect the final flavor of the liqueur.
Special equipment: You’ll need a flat-bottomed, basket-style paper coffee filter. (The smaller, cone-style coffee filters are not big enough and tend to fall over during the filtering process.) Try bumming one from your local coffee shop or buy some online.

You will also need two large pieces of ultrafine woven cheesecloth. It can be purchased at cooking supply stores or online.


Game plan: After the soaking and combining the macerating ingredients, there is a 4-week waiting period, so if you’re planning on giving your homemade amaretto as a gift, be sure to factor in the month of infusing time.


INGREDIENTS


For the macerating mixture:

•1/2 cup coarsely chopped dried apricots

•3/4 cup bottled or purified water

•2 cups vodka

•1 3/4 cups whole, skin-on, coarsely chopped almonds

•1 cup brandy

•1/4 cup coarsely chopped apricot kernels

•1/4 cup coarsely chopped dried, unsweetened cherries


To finish the liqueur:

•1/2 cup packed dark brown sugar

•1/2 cup granulated sugar

•1/2 cup bottled or purified water

•1 cup vodka

•2 teaspoons almond extract

•1 teaspoon vanilla extract


INSTRUCTIONS


For the macerating mixture:

1. In a 2-quart jar with a tightfitting lid, soak the apricots in the bottled or purified water until they’re rehydrated and most of the liquid has been absorbed, about 3 hours.


2. Add the remaining ingredients to the jar, cover, and shake.


Place in a cool, dark place to macerate for 4 weeks, shaking once per week.


3. After 4 weeks, line a medium fine-mesh strainer with two 13-by-15-inch pieces of ultrafine cheesecloth and place over a large bowl.


Drain the contents of the jar through the cheesecloth and into the bowl. Press on the solids, then gather the corners of the cheesecloth and squeeze the solids to extract as much liquid as possible. (Be careful not to let any solids drop into the strained liquid.)


 Discard the cheesecloth and solids; reserve the liquid.

4. Rinse and dry the strainer and place it over a second large bowl. Set a flat-bottomed paper coffee filter inside the strainer and pour the reserved liquid into the filter. (Be careful not to spill into the bowl.)


Let the liquid filter undisturbed until all of it has passed through and only a sludgelike beige film is left in the filter, about 5 hours.


 Remove the strainer, discarding the filter. Measure the liquid in the bowl—you should have about 1 3/4 to 2 cups. (The amount of liquid will determine how much sugar syrup you’ll add later.) Return the liquid to the bowl.


To finish the liqueur:

1. While the macerating mixture is filtering, make the sugar syrup. Place both sugars and the bottled or purified water in a small saucepan set over medium heat, stirring until the sugars have dissolved, about 5 minutes. Remove from heat and let cool to room temperature.

2. Add the vodka, almond extract, and vanilla extract to the reserved filtered liquid and stir to combine. Add about half of the sugar syrup and taste the liqueur.


Depending on how much filtered liquid you have and how sweet you like your amaretto, you may want to add more or all of the syrup. Stir to combine. Transfer to a 1-quart container with a tightfitting lid or small individual containers and store in a cool, dark place for up to 6 months.


Lemon Digestif Recipe


Lemon Digestif


Difficulty: Easy

Total Time: 10 mins, plus steeping time
Active Time: 10 mins
Makes:3 1/3 cups


Like an alcoholic Lemonhead, our take on limoncello is both tart and sweet, and is a nice finish to a big meal.
What to buy: We chose Everclear 151 grain alcohol to use in our digestifs; it picks up the flavoring elements much faster than vodka.


INGREDIENTS

•4 medium lemons

•2 cups grain alcohol, such as Everclear 151

•1 1/2 cups Rich Simple Syrup


INSTRUCTIONS


1. Using a vegetable peeler, remove lemon peel in wide strips, making sure to avoid the white pith.

2. Place peels in a 1-quart glass jar with a tightfitting lid, add alcohol, cover, and let steep undisturbed at room temperature for 6 days.

3. After 6 days, remove peels and add simple syrup. Stir to combine. Store in the freezer.

 
French Chocolate Macarons with Chocolate Ganache Recipe


French Chocolate Macarons with Chocolate Ganache
 

Difficulty: Hard

Total Time: About 1 1/2 to 2 1/2 hrs, plus chilling time
Active Time: About 25 mins
Makes:About 25 cookies


I love watching people stare at macarons in shops like Pierre Hermé and Ladurée in Paris and Paulette and Miette in San Francisco. The little sandwich cookies in myriad pastel colors turn perfectly sophisticated adults into eager children.
Macarons are not difficult to make, but they can be so finicky that they have a reputation for turning bakers’ hair gray. They often spread into odd shapes or form dark stains on top. But don’t be scared to try these, because even if they don’t turn out as beautiful as the ones in the shop windows, they’ll still taste delicious. Some tips: Let the raw macaron rounds sit at room temperature for at least 30 minutes, don’t overmix the meringue or batter, and, when possible, use older egg whites.

Special equipment: You will need a pastry bag fitted with a 1/2-inch tip. If you don’t have one, you can either spoon round dollops of batter onto the baking sheet or make a pastry bag by snipping off one corner of a large resealable plastic freezer bag.

What to buy: You will need almond meal or almond flour, which are the same ingredient—raw blanched whole almonds that have been ground into a fine powder. If you cannot find almond flour/meal, you can grind blanched almonds until very fine.


INGREDIENTS
For the macarons:

•2 cups powdered sugar

•1 cup almond flour/meal

•3 tablespoons natural unsweetened cocoa powder

•1/4 teaspoon fine salt

•3 large egg whites, at room temperature

•Pinch cream of tartar

•3 tablespoons granulated sugar


For the ganache filling:

•4 ounces bittersweet chocolate, finely chopped

•1/2 cup heavy cream

•2 tablespoons unsalted butter (1/4 stick), at room temperature and cut into cubes


INSTRUCTIONS

For the macarons:

1. Line two baking sheets with parchment paper; set aside. Fit a large pastry bag with a 1/2-inch plain tip; set aside.

2. Place the powdered sugar, almond flour, cocoa powder, and salt in a food processor fitted with a blade attachment and pulse several times to aerate. Process until fine and combined, about 30 seconds. Sift through a flour sifter into a large bowl; set aside.

3. Make a meringue by placing the egg whites in the clean bowl of a stand mixer fitted with a whisk attachment. Beat on medium speed until opaque and foamy, about 30 seconds. Add the cream of tartar, increase the speed to medium high, and beat until the egg whites are white in color and hold the line of the whisk, about 1 minute. Continue to beat, slowly adding the granulated sugar, until the sugar is combined, the peaks are stiff, and the whites are shiny, about 1 minute more. (Do not overwhip.) Transfer the meringue to a large bowl.

4. Using a rubber spatula, gently fold the dry mixture into the egg whites in four batches until the dry ingredients are just combined. (The meringue will deflate.)


 With the final addition, stop folding when there are no traces of egg whites, the mixture runs like slow-moving lava, and it looks like cake batter. (Do not overmix.)


5. Transfer the batter to the pastry bag. Pipe out 1-1/4-inch rounds about 1 inch apart onto the baking sheets, about 25 per sheet. Pick up the baking sheets and bang them against the work surface to help create the macaron base, or foot. Let the rounds sit at room temperature for 30 minutes to dry the tops and ensure even cooking.


6. Heat the oven to 350°F and arrange a rack in the middle. Bake the macarons one sheet at a time for 7 minutes. Rotate the sheet and cook for 7 minutes more. Transfer the sheet to a rack to cool completely.


For the ganache filling:

1. Place the chopped chocolate in a large bowl.

2. Warm the cream in a small saucepan over medium heat until it just starts to boil. Stir it into the chocolate without creating bubbles. Let sit for 1 minute. Add the butter and stir until smooth. Chill in the refrigerator until thickened but still spreadable, about 30 minutes.


To assemble:

1. Pair macarons of similar size. Remove the ganache from the refrigerator. If you choose to pipe the ganache, transfer it to a resealable plastic bag and snip about a 1/2 inch off a bottom corner. Squeeze or scoop the ganache to about the size of a cherry (about 1 teaspoon) onto the center of a macaron half.


 Top with another half and press gently so that it looks like a mini hamburger. The filling should not ooze out the edges. Refrigerate, covered, at least 24 hours before serving.


Take No Prisoners Hot Sauce Recipe


Take No Prisoners Hot Sauce

Difficulty: Easy

Total Time: About 35 mins
Makes:1 1/2 cups or 2 (6-ounce) bottles


When it comes to hot sauce, our photographer, Chris Rochelle, likes it fiery. For the faint of heart, we suggest using his sauce as a light seasoning in things like chili, tacos, eggs, hummus, and curry. A little goes a long way.


INGREDIENTS
•2 medium carrots (about 6 ounces), cut into 1/2-inch rounds

•16 serrano peppers (about 4 ounces), stems removed

•1/2 cup freshly squeezed lime juice (from about 5 to 6 limes)

•3 tablespoons water

•1/2 teaspoon onion powder

•1/2 teaspoon fine salt

•1/4 teaspoon granulated sugar


INSTRUCTIONS


1. Bring a medium saucepan of water to a boil over medium-high heat. Add the carrots and boil until easily pierced with a fork, about 12 minutes. Drain in a colander and set aside to cool slightly.

2. Place the carrots and remaining ingredients in a food processor or blender and process until smooth, about 2 minutes. Transfer to a glass container, cover, and refrigerate for 2 days to allow the flavors to meld.

3. Thoroughly clean and dry 2 (6-ounce) glass bottles. Transfer the hot sauce through a funnel into the bottles and seal. Store in the refrigerator for up to 1 month.

DECEMBER FOOD HOLIDAYS!


   December is a time to celebrate our faith, be with our family, and enjoy great food. But, there are more food holidays in this month than you might think. Actually there is a national food holiday for everyday of the year. In this article, you'll not only find out which food holidays are in December, but you'll also find suggestions on how to celebrate each holiday.


National Pie Day December 1: Pies are so easy to make, especially if you start out with store bought pie crusts. Just make a quick filling, bake, and enjoy.

National Fritters Day December 2: Try a nice apple fritter for breakfast with a big cup of coffee.

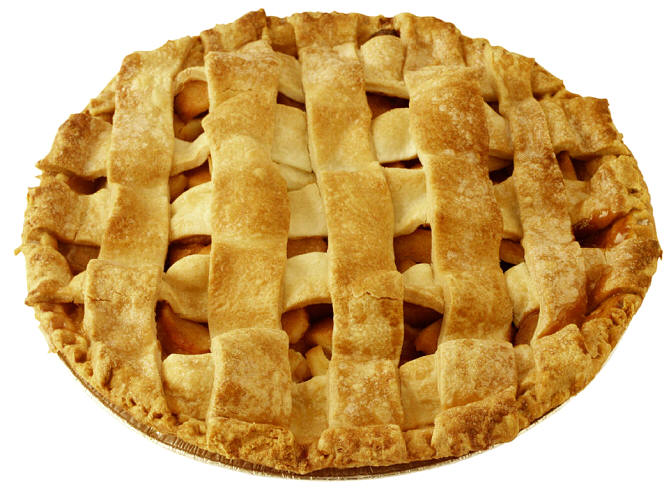
National Apple Pie Day December 3: Apple pies are so easy to make, but since you just made a homemade pie, why not pick up a Mrs. Smith's pie? Just bake and add a big scoop of vanilla ice cream.

National Cookie Day December 4: This is definitely the time to bake cookies. Get out your favorite recipe and make a large batch for friends and family.


National Sacher Torte Day December 5: Sacher Torte is a chocolate cake that was invented in the 1800s. You can find many recipes online or you can just bake a regular chocolate cake instead.

Microwave Oven Day December 6: For this food holiday, do something fun and find a recipe for candy that can be made in the microwave.

National Cotton Candy Day December 7: This is another food holiday that can be really fun. Spend the day at a local theme park, which happens to be one of the best places to find cotton candy.

National Chocolate Brownie Day December 8: On this food holiday, do something easy yet decadent by jazzing up a store bought brownie mix.

National Pastry Day December 9: Visit your favorite bakery on this fine food holiday and stock up on all your favorite goodies.


National Lager Day December 10: Head to a nice pub and enjoy a delicious lager with meat and potatoes.

National Noodle Ring Day December 11: There are several variations of this dish. Just go online and find a recipe that sounds great to you.

National Cocoa Day December 12: Is there anything better on a cold winter night than curling up with a blanket, your sweetie, and a hot cup of cocoa?

Ice Cream and Violins Day December 13: I'm not exactly sure how this food holiday started, but does anyone really need a reason to enjoy ice cream?

National Bouillabaisse Day December 14: Enjoy a hearty fish stew on this food holiday.


National Cupcake Day December 15: This is another great food holiday. Just make your favorite cupcakes and enjoy.

National Chocolate Covered Anything Day December 16: Go all out of this food holiday and make your favorite candy, chocolate covered cheesecake, and even chocolate covered pretzels.

National Maple Syrup Day December 17: Enjoy a delicious stack of pancakes on this food holiday.

National Roast Suckling Pig Day December 18: I'm not sure who actually has time to roast a whole pig, especially during the holiday season. For this food holiday, just serve pork chops or a nice ham instead.

National Hard Candy Day December 19: It's almost Christmas, enjoy a nice candy cane.


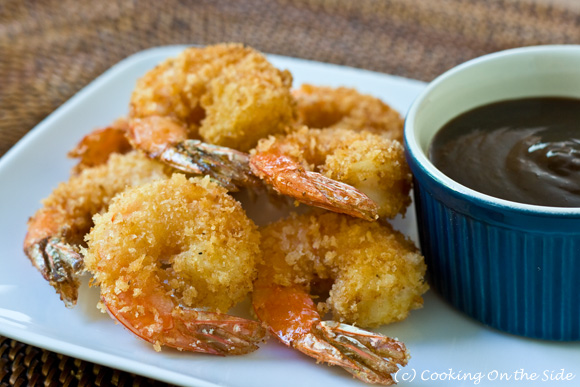
National Fried Shrimp Day December 20: Head out to your favorite seafood restaurant and enjoy jumbo fried shrimp.

National Hamburger Day December 21: On this food holiday, go all out and make gourmet hamburgers. Stuff them with blue cheese and top them with pepper bacon, slices of avocado, and flavored mayonnaise.

National Date Nut Bread Day December 22: Date nut bread is delicious served with sweetened cream cheese.

National Pfeffernuesse Day December 23: These are a heavily spiced cookie. If you wanted to, you could make gingerbread men cookies instead.

National Eggnog Day December 24: On this food holiday, serve up a big mug of eggnog topped with whipped cream and cinnamon.


National Pumpkin Pie Day December 25: Enjoy a nice pumpkin pie with your holiday feast.

National Candy Cane Day December 26: After all the Christmas activities are done, sit back and enjoy a nice candy cane.

National Fruit Cake Day December 27: If you like fruit cake, enjoy a nice slice. If not, enjoy another type of cake instead.

National Chocolate Candy Day December 28: Go to your local department store and stock up on all the boxes of leftover Christmas candy.

Pepper Pot Day December 29: This is a Jamaican soup and the recipe can be found online. This is a great recipe to make if you're tired of the cold weather.


National Bicarbonate of Soda Day December 30: Put your baking soda to use and make some delicious baked goods.

National Champagne Day December 31: Ring in the New Year with a nice glass of champagne or sparkling cider if you don't drink alcohol.

DECEMBER HOLIDAYS AND OBSERVANCES!


Besides all the popular winter holidays, there are lots of other reasons to celebrate throughout the month of December. Check them out.


December 1: Special Kids Day - If you have any special kids in your life, make this a day for them to remember.

December 2: International Day for the Abolition of Slavery - You may have thought that slavery was abolished long ago, but it still goes on.

December 3: International Day of Disabled Persons - Spend the day like a disabled person would. I bet you will appreciate everything you are able to do that other people might not be able to.

December 4: National Cookie Day - What else would you do on National Cookie Day?


December 5: Bathtub Party Day - A party in the bathtub? That just sounds wrong.

December 6: St. Nicholas Day - It's like having a Christmas before Christmas.

December 7: National Cotton Candy Day - Try to not get sick from eating too much sugar.

December 8: Wild Card - Believe it or not, there are no holidays (that I know of) on the 8th. Make up your own holiday.

December 9: Weary Willie Day - Take a nap. It will make you feel better.


December 10: Human Rights Day - Exercise all your rights today.

December 11: UNICEF Birthday - Don't forget to throw a party with balloons and everything.

December 12: Poinsettia Day - Decorate the house in poinsettias (but if you have pets keep them all up high!).

December 13: Wild Card - Make up another holiday.

December 14: Wild Card - And another...


December 15: Cat Herders Day - I've heard of cattle herding and sheep herding...but never cat herding. Why not give it a try, and see how it goes?

December 16: National Chocolate-Covered Anything Day - Of all the chocolate holidays throughout the year, this one's my favorite. I mean, you can cover anything in chocolate.

December 17: Wright Brothers Day - Hold a party for them. Who cares if they don't attend? A party's a party.

December 18: International Migrants Day - Write a thousand word essay about the effect of the increasing number of migrants in the world.

December 19: Day for South-South Cooperation - No, I didn't stutter.


December 20: Mudd Day - Have a mud--er--mudd fight.

December 21: Humbug Day - This is the one day each year you have a reason to go around telling everyone, "Bah, humbug!"

December 22: National Haiku Poetry Day - Speak in haiku all day. Five syllables, then seven, then five more.

December 23: Festivus - It's like a festival that anyone can attend.

December 24: Christmas Eve - Of course, you know what Christmas Eve is. No? It's the day before Christmas, silly.


December 25: A'phabet Day (No 'L' Day) - Not only is December 25 Christmas Day, but it's A'phabet Day. No 'L's allowed. Remove them from your vocabu'ary, p'ease.

December 26: National Whiners Day - It's okay to whine. In fact, it's encouraged on National Whiners Day.

December 27: Wild Card - Finally...you need to get one more wild card in before the year is over. Make this one special.

December 28: National Chocolate Day - Eat some chocolate...but it doesn't end here. National Chocolate Day goes on into the 29th, as well.

December 29: National Chocolate Day - Eat some more chocolate.


December 30: Falling Needles Family Fest Day - Let the dried up needles fall off the tree, then dance around it. Barefoot.

December 31: Make up Your Mind Day - Is it--wait. No, maybe not. Yep, I guess it's my birthday, after all.

HOW TO SHIP COOKIES AND OTHER TREATS FOR THE HOLIDAYS!

How to Ship Cookies and Other Treats for the Holidays


Merry holiday wishes alone will not protect baked goods in their travels through the mail. They can lose their crunch, go stale, or just get tumbled around enough to crumble those perfect linzer cookies you're so proud of.
Here are the tips you need to know to ship your baked goods and have them arrive on time and intact for Christmas.

SELECT YOUR COOKIES
Unless you are spending big bucks to ship with an overnight service, plan to mail baked goods that will taste fresh and stay crisp for about a week. "When you bake at home, you don't think about shelf life," says Jenna Park, co-owner of Whimsy & Spice bakery in Brooklyn, New York. "But definitely for shipping you have to." You don't want to ship any cookie or baked good that won't hold up for three to five days sitting around your house in the container you plan to ship in. Not sure? Do a test batch and see what happens.


The Best Type of Cookies to Ship: Soft, moist cookies have "less of a shelf life because the moisture will help it deteriorate," says Rose Levy Beranbaum, journalist and author of Rose's Christmas Cookies. Drier, crispier varieties will last longer. "Shortbreads are probably the most fail-safe," says Whimsy & Spice's Park. Other good bets are sugar cookies, biscotti, or crisp gingerbread.

Not as Foolproof But Totally Doable: Use faster shipping methods for anything soft and moist, like brownies. The same goes for cookies with nuts, says Beranbaum—because nuts go rancid quickly, they shorten the shelf life of a cookie to about a week. For doughs with cream cheese in them (like rugelach), "five days is my rule of thumb for shelf life," says Beranbaum.

Mail at Your Own Risk: "One of my favorite cookies I would never ship," warns Beranbaum. "My lemon butter bars. Or cheesecake bars." They are too soft, squishy, and perishable. She also says she's hesitant to ship meringues because they are so delicate (but at least they still taste good broken).

DON'T BE A CRAPPY PACKAGER
To avoid an epic cookie-shipping failure, start by fully cooling your treats before trying to cram them into bags or tins or anything else but your mouth. You don't want any extra steamy moisture caught in there to speed spoilage. That said, mail the cookies as soon as possible after baking, advises James Wigdel, spokesperson for the U.S. Postal Service in San Francisco. This will get you the most out of the shelf life.
Also, use the right containers. You've got a few options: Beranbaum is a fan of Snapware containers because they have gaskets and form an airtight seal. Tins are fine too, but you'll need to tape around the lid to add a seal and hedge your bets against the lid popping off somewhere in transit. At the minimum, Wigdel says, you should use one of those inexpensive plastic food storage containers, such as the kind Ziploc makes.
The often-overlooked key to good packing is keeping your cookie types separated. "You want crunchy to stay crunchy and soft to stay soft. If you put them together, the crunchy get soft, and the soft turn hard," says Beranbaum. That doesn't mean you have to ship multiple tins. You can separate the types with resealable bags, or class it up and get cellophane goodie bags, advises Park, and tie them up with a ribbon. If you're just shipping one type of cookie, put sheets of waxed paper between the layers as you fill the tin. Either way, fill in the gap at the top with crumpled waxed paper, says Jennifer Caccavo, a spokesperson for FedEx.

BOX AND DELIVER
Once you have your treats secured in a container, use a sturdy corrugated box designed to ship in, says Kristen Petrella, a spokesperson for UPS. Then be sure to have at least two inches of packing material on all sides. You can use crumpled newspaper, foam peanuts, bubble wrap, shredded paper, crumpled old plastic or paper bags, or do as Beranbaum does and fill up resealable bags with real popcorn and pack those around the treats as a bonus for the giftee. "Shake the box—if you can feel or hear any movement, add more cushioning!" says FedEx's Caccavo.
Caccavo, Petrella, and Wigdel all advise writing the recipient's name and address on a note card stuck inside the box—if the exterior label falls off or becomes unreadable, the carrier can still get it to your giftee. And skip the brown paper and string overwrap, since it "can potentially catch in package sorting equipment," warns Petrella. Seal the box with packing tape—not flimsy Scotch tape you stole from the office—clearly address it, and ship it out. And don't wait too long! Here's our last-minute slacker shipping chart.


DROP-DEAD DROP-OFFS FOR DELIVERY BEFORE CHRISTMAS

First Class: December 20
Priority Mail: December 21
Express Mail: December 22
USPS delivers only Express Mail on December 25.

Ground: December 17 (but better to ship earlier if possible)
Express (overnight): December 23
FedEx does not schedule deliveries on December 25.
Caccavo says sometimes altruistic carriers will do volunteer deliveries in the event of severe weather, but don't count on it!

Ground: Most likely December 20
If you're shipping coast to coast, UPS advises customers to use its "time-in-transit" maps online to determine the exact number of days to allow for shipping to your recipient. It's possible you will need to ship earlier.
3 Day Select: December 21
2nd Day Air: December 22
Next Day Air: December 23
UPS does not deliver on December 25.

CHRISTMAS IN THE CZECH REPUBLIC!


   In the Czech Republic, preparations for Christmas begins right from around mid-November. Houses are thoroughly cleaned, carpets washed and furniture dusted. Gift shops and departmental stores are seen to be decked for the occassion. The festive spirit is apparent with buyers turning up at the stores every evening to purchase gifts, new apparels and various items of decoration. Also bought are sweets like Linzer cookies and Vanilla roll or food items such as "Vanoka", traditional Christmas loaves. These are either bought or even baked at home.
   The Advent period begins here four Sundays before Christmas Eve. During this time, a wreath is made of several evergreen branches fastened together, decorated with ribbons, pinecones and other trinkets and four candles placed around it, each representing one of the four weeks of the Advent period. Children are gifted beautiful Advent calendars to count the days to December 25. Every day they open one of the 24 small windows in it and find a small reward, usually a piece of chocolate, behind each of them.


   A well known custom observed here is "Barborky" that is practiced on the feast day of St. Barbora. On every 4th of December, young girls of marriageable age cut off a twig from a cherry tree and put it in water. If it blooms by Christmas Eve, the girl is believed to get married sometime during the coming year.
In the final days to December 25th, gifts and greetings are sent out to friends and family members. Every individual home is decorated as beautifully as possible. The Christmas tree is indisensable to the Czech Christmas decorations. Fruits such as red apples and nuts, straw crafts and glass decorations are traditionally used to adorn these trees. Christmas trees are set up, either on December 23rd or 24th, in individual homes and even in public squares in Czech towns and cities. The Christmas tree on Prague’s Old Town Square is very popular and a tourist attraction during the season. Christmas trees,


whether in Czech homes or public spots, are taken down usually before January 6th, the Day of Epiphany. Setting up the manger is also an important part of Czech Christmas and one of the oldest traditions here. Throughout the republic, the Nativity Scene is created in varying sizes and from various materials like wood, paper, ceramics, gingerbread and the like. The Baby Jesus, surrounded by Mary and Joseph, form the focus of the manger scene.
   The Christmas season in the Czech Republic begins with the feast and the visit of St. Nicholas or Svaty Mikalas on December 6th. The feast of St. Nicholas (or Svaty Mikalas) is enthusiastically celebrated here. During the evening of the 5th December, children watch the sky for any sign of St. Nicholas.
    Czechs believe that Svaty Mikalas climbs down to earth from the heaven using a golden rope and carrying two sacks - a sack filled with presents for good children and a sack filled with sticks for kids who behave badly throughout the year. On the eve of the feast day, December 5th, children hang a stocking in their windows to be filled by St. Nicholas at night. On St. Nicholas' day, children wake up to recieve their presents. But they get their main presents only on Christmas eve evening.


On Christmas Eve (December 24th) families gather at home to decorate the Christmas tree and prepare dinner. Many people, especially the devout ones, fast all day long on Christmas Eve and break it with a grand meal in the evening, when the first star emerges in the night sky. All relatives and friends are invited to the Christmas dinner. Fish soup and fried carp with potato salad form the main menu of a traditional Christmas Eve dinner. It is considered unlucky to get up from the table before everyone is finished. Also, the table is always set for an even number of guests in the belief that it would bring bad luck if done otherwise. Presents are exchanged after dinner and often, fortunes are told. At midnight, people attend Holy Mass, known as "Pasterka".
   On December 25th (Christmas Day), the churches in Czechoslovakia are adorned with evergreens and Christmas Trees. The festivities last for three days. Czechs traditionally have a cod roe soup on this day and tempt each other with tales of a mythical golden pig. Everyone wishes each other 'Prejeme Vam Vesele Vanoce' (Merry Christmas) on this day.

DIY HOLIDAY GIFTS, PART I!

  
   This comes from http://www.chow.com/ .  Enjoy these wonderful, edible holiday gift ideas.  Simple and Tastey!

Caramel Corn Recipe


Caramel Corn


Difficulty: Easy
Total Time: 15 mins, plus 1 hr baking time
Makes:15 cups


This easy treat—popcorn slathered with buttery caramel—had the CHOW staffers lurking around the test kitchen awaiting the next batch. The caramel corn will last up to a week, making it the perfect gift to package and mail during the holidays.


Game plan: If you’re popping your popcorn on the stovetop, place 1/4 cup vegetable oil in a large pot with a tightfitting lid over medium heat. When the oil shimmers, add 1/2 cup popcorn kernels, cover, and shake to evenly distribute. Once the kernels start popping, gently shake the pot until the popping dies down, about 2 to 3 minutes.

.
INGREDIENTS


•15 cups popped plain popcorn (from about 1/2 cup kernels)

•1 1/2 cups packed dark brown sugar

•12 tablespoons unsalted butter (1 1/2 sticks), cut into 6 pieces, plus more for coating the pan

•1/4 cup plus 2 tablespoons light corn syrup

•1 teaspoon fine salt

•1 teaspoon vanilla extract

•1/2 teaspoon baking soda

INSTRUCTIONS


1. Heat the oven to 250°F and arrange a rack in the middle. Coat a large roasting pan with butter and place the popcorn in the pan; set aside.

2. Place the brown sugar, butter, corn syrup, and salt in a medium heavy-bottomed saucepan over medium heat and bring to a boil, stirring occasionally with a rubber spatula until the sugar has dissolved, about 5 minutes. Continue to boil without stirring for 3 minutes.


 Remove from heat, add the vanilla and baking soda, and whisk until the caramel is light in color, foamy, and has doubled in volume, about 10 seconds.


 Immediately drizzle over the popcorn, stir with a rubber spatula until thoroughly coated, and spread into an even layer.


3. Bake, stirring every 15 minutes with a rubber spatula and scraping up any caramel from the bottom of the pan, until a cooled piece of popcorn is very crunchy, about 45 minutes to 1 hour total. (To test for doneness, take a few pieces of popcorn out of the oven and let cool for 30 seconds. If they’re crunchy, then the caramel corn is done.)

4. Transfer the caramel corn to a work surface or rimmed baking sheet to cool completely (it will crisp as it cools). Store in an airtight container at room temperature for up to 1 week.


Spiced Preserved Lemons Recipe


Spiced Preserved Lemons

Difficulty: Easy
Total Time: 30 mins, plus soaking and fermentation time
Active Time: 20 mins
Makes:1 quart

Preserved lemons add tang and saltiness to many Mediterranean dishes. Try them in our Preserved Lemon and Bitters Vinaigrette, Vegetable Tagine, or Moroccan Charmoula Dressing.


What to buy: Look for lemons that don’t have any wax on the outside—organic lemons tend to be unwaxed. If you can only find conventional lemons, wash them briefly under very hot water to remove any wax.

Special equipment: You will need a resealable quart jar, a band, and a new lid for storing the lemons. A wide-mouth canning jar works best.

Game plan: You’ll need to begin this recipe the night before, by soaking the lemons.


INGREDIENTS

•10 medium lemons (preferably organic, without a wax coating)

•3/4 cup kosher salt

•3 bay leaves

•2 (4-inch) cinnamon sticks

•1 teaspoon whole allspice

•1 teaspoon whole cloves

•1 teaspoon whole coriander


INSTRUCTIONS

1. Soak the lemons in cold water overnight, weighing them down with a plate or plastic bag filled with water. Drain and dry the lemons with a towel.

2. Bring a large pot of water to a boil over high heat (the pot needs to be deep enough so the water covers the 1-quart jar). Place the clean, wide-mouth quart jar, band, and lid in the water and lower the heat to a simmer. Simmer for 10 minutes, then turn the heat off, leaving the jar in the water until ready to use. Remove the band and lid and dry with a clean towel; set aside.

3. Working over a medium bowl, take 7 of the lemons and make 4 equally spaced lengthwise slits in each, starting about 1/2 inch below the stem and ending about 1/2 inch above the base. Cut through the skin, stopping at the center of the lemon. Squeeze each lemon gently from top to bottom so the slits pop open, then sprinkle the interior with 1 heaping tablespoon of the salt, making sure the salt gets into the center. Let any excess salt or lemon juice fall into the bowl.

4. Remove the jar from the pot and shake out any excess water; set aside. Add the remaining salt and the spices to the bowl and stir to combine. Drop some of the salt-spice mixture into the jar and add the lemons one at a time, compacting each with a wooden spoon until it releases its juice and is packed very tightly. Alternate layers of the salt-spice mixture and lemons, adding all of the mixture and stopping when you reach the shoulder of the jar. If the lemons are not completely covered with their own juices, squeeze the juice from the 3 remaining lemons and pour it into the jar. Seal the jar and place it in a warm, bright spot.

5. Once a day for the first week, shake the jar and carefully open it over the sink to let out any excess gas. After the first week, the fermentation will slow and you’ll only need to shake and “burp” the jar once every 7 days. After about a month, the liquid will clear and the lemons will be ready to use. They will keep for up to 2 months in the refrigerator.


Chocolate-Dipped Salted Caramels Recipe


Chocolate-Dipped Salted Caramels
Difficulty: Medium

Total Time: 2 hrs, plus cooling time
Makes:About 85 caramels


We can’t get enough of these salty-sweet treats. Make a batch, put them in small candy boxes, and your holiday shopping is complete.
Special equipment: For coating the caramels in chocolate, you’ll need a kitchen scale and a chocolate thermometer such as CDN’s.
What to buy: Professional pastry chefs use a type of chocolate known as couverture, which sets up nicely because it contains more cocoa butter than regular chocolate. The only trick is, you need to temper it. For this recipe, we used El Rey 58.5 percent dark chocolate Discos; they can be found at many specialty grocery stores or online.

Game plan: The caramels can be made ahead of time and stored in an airtight container until ready to coat.
In our experience, it’s best to avoid tempering chocolate on a hot day or to work in an air-conditioned space. Chocolate behaves best at a room temperature between the mid-60s and low 70s. Also, chocolate stays in temper for only a short time, so have everything ready to go and work quickly.


Once coated, the chocolate caramels will keep for 2 weeks in the refrigerator.


INGREDIENTS


•1 1/2 cups heavy cream


•1 1/3 cups granulated sugar

•1/2 cup light corn syrup

•1/2 cup packed dark brown sugar

•6 tablespoons unsalted butter (3/4 stick), cut into pieces and at room temperature, plus more for coating the pan

•2 teaspoons vanilla extract

•3 1/2 teaspoons fleur de sel or other coarse sea salt

•1 1/2 pounds (24 ounces) bittersweet chocolate, coarsely chopped


INSTRUCTIONS


1. Coat an 8-by-8-inch baking dish with butter. Cut a piece of parchment paper—it should be a little less than 8 inches wide and long enough so that it rides over two sides of the dish when pressed into it. Press the parchment paper flat into the baking dish, creasing the paper at the corners. Coat the parchment-lined pan with more butter and place it on a wire rack.

2. Place the cream in a large, heavy-bottomed saucepan over medium-high heat and bring to a boil, about 3 minutes. Stir in the sugar, corn syrup, and brown sugar and return to a boil, stirring constantly with a wooden spoon until the sugars have dissolved, about 3 minutes. Reduce the heat to medium and keep the mixture at a gently rolling boil, stirring occasionally, until it reaches 255°F on an instant-read thermometer, about 20 to 25 minutes. (It will reach 225°F very quickly but then very slowly rise toward 255°F.)

3. Remove the pan from heat, add the butter, vanilla, and 2 1/2 teaspoons of the fleur de sel, and stir until the butter has melted and the mixture is combined. Pour into the prepared dish and let cool until the surface of the caramel is set and the dish is only slightly warm, about 1 hour.


4. Place the dish in the freezer until the caramel is just firm, about 15 to 20 minutes (do not let it freeze for too long). Run a knife along the edges of the caramel. Using the exposed edges of parchment paper, pull the caramel slab from the pan, flip it over onto a work surface, and remove the parchment. Sprinkle with the remaining 1 teaspoon fleur de sel and press gently so that the salt adheres to the caramel. Line a baking sheet with parchment paper.


Cut into 3/4-inch squares.

Line a baking sheet with parchment paper. Transfer all of the caramels to the baking sheet (making sure they don’t touch) and place in the refrigerator to harden again.


5. Bring a medium saucepan filled with 1 to 2 inches of water to a simmer over high heat; once simmering, turn off the heat. Place 18 ounces of the chocolate in a dry, heatproof bowl. Set the bowl over the saucepan and, using a rubber spatula, stir until the chocolate has completely melted and has reached 118°F. (Make sure the chocolate does not come into contact with any water or exceed 120°F.)

6. Remove the bowl from the saucepan. Add the remaining 6 ounces chocolate and stir until all of the chocolate has melted and the temperature has cooled to 80°F. (To speed this step up, you can place the bowl of chocolate over a bowl of ice water—but only once all of the chocolate has melted.)

7. Once cooled, return the bowl of chocolate to the saucepan and stir until the chocolate reaches 88°F; immediately remove from heat. Do not remove the thermometer from the bowl; check the temperature periodically to make sure it stays between 87°F and 89°F. (The chocolate must remain in this temperature range while dipping the caramels or it will not set properly.) Keep the saucepan of water over low heat and, when needed, set the bowl of chocolate over it to reheat.

8. To test if the chocolate is properly tempered, spread a thin layer on a piece of parchment paper and place it in the refrigerator for 3 minutes to set. If the chocolate hardens smooth and without streaks, it is properly tempered. (If it is not properly tempered, let the melted chocolate harden and start the tempering process over again: Bring the chocolate up to 118°F, then down to 80°F, then up again to 88°F.)

9. Line a second baking sheet with parchment paper. Remove the caramels from the refrigerator. Drop a caramel into the chocolate and, using a dinner fork, turn it to coat. Lift it out of the chocolate and tap the fork several times on the edge of the bowl. Scrape the bottom of the fork against the edge of the bowl to remove any excess chocolate.


Place the coated caramel on the empty baking sheet. Repeat with the remaining caramels, using the first baking sheet when the second sheet is full and making sure the caramels do not touch. Let sit until the chocolate sets.


Store in an airtight container in the refrigerator for up to 2 weeks.


Palmiers Recipe


Palmiers
Difficulty: Easy

Total Time: 1 hr 5 mins
Active Time: 20 mins
Makes:About 28 cookies


Made from thinly rolled puff pastry dough that’s been folded in finely ground sugar, palmiers rise into caramelized, crispy cookies. Store-bought puff pastry dough makes what is otherwise a time-consuming treat a cinch.
What to buy: Be sure to look for an all-butter puff pastry; the flavor is superior. You will find brands like Dufour in the freezer section of many specialty grocery stores, including Whole Foods. Avoid brands made with partially hydrogenated shortening.

We’ve written this recipe to accommodate puff pastry brands sold in both one and two sheets.


INGREDIENTS


•1 cup granulated sugar

•1/2 teaspoon fine salt

•1 (14- to 16-ounce package) frozen puff pastry, thawed according to the package directions


INSTRUCTIONS

1. Place sugar in the bowl of a food processor fitted with a blade attachment and process until fine, about 1 minute. Remove 1/4 cup of the sugar from the food processor and set aside for dipping the cookies in just before baking. Add salt to the remaining 3/4 cup sugar and pulse about 3 times to combine.

2. Sprinkle about half of the sugar-salt mixture onto your work surface to match the size of the puff pastry.


Place the puff pastry sheet(s) on the sugar mixture with one of the short ends closest to you and sprinkle the remaining sugar mixture evenly on top. If you’re using a single puff pastry sheet, roll the dough into a 1/8-inch-thick rectangle, sprinkling loose sugar from the work surface onto it as you roll. If you’re using two sheets, roll each to 1/8 inch thick (you will have two 9-inch squares), sprinkling loose sugar from the work surface onto the dough as you roll.


3. Fold the top third of the single sheet over the middle third, then fold the bottom third over the top and middle thirds, as if folding a business letter.


If you’re using two 9-inch square sheets, fold each in half.


4. Rotate the dough piece(s) so one of the short ends is closest to you. Sprinkle more loose sugar from the work surface on the dough. Roll the dough piece(s) out from left to right only (not top to bottom) to about 3/8 inch thick (between 6 to 8 inches wide). (It does not matter how long the dough is at this point.)


5. Determine the center line of the dough piece(s) running from top to bottom. Fold the left and right sides to the center line, so the two folds just touch in the center.


 Fold one half lengthwise over the other (as if closing a book). You should now have one long piece (or two pieces) of dough about 2 inches wide. Gently run the rolling pin over the top of the dough piece(s) to press the layers together. Refrigerate until firm, about 30 minutes.


6. Meanwhile, heat the oven to 400°F and arrange a rack in the upper third. Line two baking sheets with parchment paper.

7. Cut half of the dough into 1/2-inch-thick slices crosswise (keep the remaining dough refrigerated).


 Dip the slices on both sides in the reserved ground sugar.


Place the slices on one of the prepared baking sheets 1 1/2 inches apart; about 12 to 15 should fit.


 Bake until the sugar around the edges of the palmiers just starts to caramelize, about 8 to 10 minutes. Remove the baking sheet from the oven and flip each palmier over with a spatula. The palmiers will spread; use the spatula to push them back together, being careful not to touch the hot sugar with your fingers.

8. Rotate the baking sheet and continue baking until the cookies are a deep golden brown, about 8 to 10 minutes more. Transfer the baking sheet to a wire rack to cool completely. Repeat cutting and baking with the remaining dough on the second baking sheet.